Sunday, March 31, 2013

Volvo S60 DIM disassembly

A big hi to all my readers! When I created this blog, I had one thing in mind, that being sharing with all of you my ideas of possible upgrades to my Volvo S60, and also to help my readers when they begin their projects. Each time I upgrade something from now on, I will also try to post a tutorial. That being said, I now open the DIY Tutorials section, with my first tutorial regarding Volvo S60s DIM or Data Information Module (the instrument cluster) disassembly.
My first step when I start a project involving the electrical equipment is always to take of the leads to my battery. However, considering that the Volvo S60 has the battery in the trunk, and under a plastic shield which is rather hard to take out without taking out the spare wheel, I disconnect the leads under the hood.
You can find them under a small plastic door attached to the fuses box. Unscrew the bolt and you are good to go.
Secondly, go in the car and place the steering column in the most outward and downward position. If you have small hands and are confident that you will not scratch your cars trim you can skip this step, but bear in mind that the work space for this project is pretty small.
Now we start taking out the outer plastic rim surrounding the DIM. You need a firm but soft hand. All you need to do is to pull outward and up the rim using both your hands witch you place on the upper side of this plastic rim.
After you did this, your dashboard should look like in the picture above. Now, the bottom part of the plastic rim is taken out in a similar fashion. You place your hands right above the steering column and place your fingers in the small opening just above it. With a firm upward pull, you should have now disconnected the plastic rim. 
Final note about the plastic rim. It will still be attached with 3 evenly distributed plastic clips against the small plastic cover of the steering wheel (picture below)
Pull them out gently, and your done. Now, your dashboard should look like this. The DIM is fixated with 4 torx T25 screws. Yes, there is a lot of dust in there too, mainly because, I never taken the DIM out before and the car is 10 years old, and secondly, I'm sorry to say there is a lot of dust in Romania.
 2 T25 screws on the right.
  and another 2 T25 screws on the left.
All you need to do is to unscrew them. Careful not to drop the screws. You're almost done. Next, pull gently the DIM out and place it face down against the steering wheel like in the picture below.
Find the green DIM connector located approximately in the middle of the clusters back panel. You can already see it in the picture above, and the next pictures below.
 Now disconnect it by pressing the small protuberance on it and pulling it out.
You have now successfully disconnected your DIM.

Part 2 of the project is how to take apart the DIM.
The DIM is composed of 3 parts that are attached together by plastic clips. There is the electronics part which is located in the white plastic casing, the black plastic casing which is the part where all the kph and revs, etc are painted upon and the final part is the lens. Using a Flathead screwdriver you can gently separate them. As you can see in the picture below, there are 3 black clips and 4 transparent clips on the bottom which have to be undone.
 On the upper side of the DIM there are another 3 clips that hold the white electronics part. Undo them gently. Now you have access to the electronics module.
 lifting the lens and black trim of the instrument cluster.
 The lens is attached to the black plastic part by 5 transparent clips. Undo them gently, and be careful about the center one, I broke a sweat trying to remove it
Well, that's about it. Now your DIM is disassembled. To reassemble it, press all the parts carefully back, and follow all the steps back. Don't forget to reattach the green connector and the leads to the battery and your all done.
I wish to thank my brother-in-law for helping me (you can check his games site if you like) and, of course my fiancee for cleaning up inside the car where all the dust was (check her cosmetics website or her blog)

Well, I hope everything was clear and helpful. If you encounter problems, contact me or write me a comment. Also if you like my work, keep reading and let me in your ideas by writing a comment below.

Till next time, safe journeys!


Saturday, March 30, 2013

Painting the exterior mouldings

Hello, my friends!
Today I will share the experience I had during the hot summer of 2010, when I decided I wanted to paint my Volvo S60s exterior plastic mouldings. I decided to go that way, because I wanted, as I said in earlier posts, an exterior look closer to the newer S60 models. Here's my car before the paint-job:
You probably wonder, how did I got the obsession about the MY2005 and up look? Well, funny thing, I parked once near an almost exact Volvo S60. Why is funny? Because here in Romania, it's more likely that 2 identical German cars (SUV) will meet in a random intersection (seen it quite often) than having 2 Volvo S60s parked next to each other. So the pictures below are quite rare (impossible even, in Romania). The only noticeable difference was the exterior look. Of course the car color was also a bit different, mine is Volvo Cosmos blue metallic 450, the other is a newer shade - Volvo Barents blue metallic 466, but, I prefer my shade of blue. Here, what do you think?
twins with a different birth date
 and another shot.
So, I went to the guy who painted my trunk fin and asked him to paint the mouldings. Also, must note that I didn't paint the side skirts, because I didn't quite made my mind as to how they will  look in the end, will I buy some sport kit side skirts or not, etc. 
Another note, the plastic mouldings had a discrete course look and feel to them, witch had to be sanded down for perfect paint adhesion. And a funny note, I already confessed my fear of damaging the car in the process of updating, so I also bought a used set of exterior mouldings. Now they lay around in my back yard. The mouldings came off quite easily, being hold in place with nothing but a few clips and double sided tape. Next day they were finished and installed. Here's the finished look:
front
 back
 side
 front, drivers side
Improvement or not? Tell me what you think. Write me a comment in the section below.


Friday, March 29, 2013

Volvo S60 Chrome Dial Rings from www.tuning-shop.co.uk

OK my friends, guess what? I got mail. And what was in the mail, you ask? Well, it was a little package.


With this post I inaugurate a new section called Unboxing. Right now, I will show you what's in the box, from where I purchased the product and how much it costs. Also I will give you relevant data on the shipping time and cost (however, the cost may vary depending on your country, of course). The final thoughts regarding this product will be layed down in another post in the Changelog section.
As soon as I have time for the installing, I will also do a step by step DIY installation instruction which you will always find in the DIY Tutorials section. 
So, without further ado, let's see what's in the box:
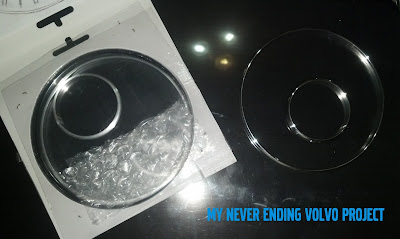
Well, obviously, in the box we have 4 chrome rings 2 large and 2 small for my DIM.  They are packed 2 by 2 one small and one large. 
Also in the package there are some handy instructions for installation, and also a YouTube link (I will not post it since the make of the car in the video is other than Volvo S60). Nice touch.

Costs: 38,71$ or 25.49GBP. Handling and shipping to Romania, another 6,90GBP. I find the price reasonable. I bought it from e-bay, but they also have a web site (found in the title). The product arrived in a very short amount of time, witch is another plus.
Well, that's it. Tell me what you think in the comment section below.


Thursday, March 28, 2013

S60 interior and exterior led conversion

So, my beloved readers, I will tell you about my almost full led conversion. After installing my Xenon lights, I started loving the electric white-blue ( or ice blue if you prefer ) color they produced and started loathing the yellow almost hepatic color normal bulbs produce. And no, this story doesn't start with a trip to the guy who installed my xenon lights... unfortunately. This story starts with me buying some cheap 5W5 LED bulbs. They were OK, the light they produced was very faint and a bit too blue if you ask me. They came in a set of 4 and were about 5$ the set.
my first position/parking LED lights
Needless to say they soon started to burn out on a regular basis especially when driving on bumpy roads ( don't get it why, it could be a coincidence since most roads in Romania are bumpy :)) ) Oh, and they didn't gave me a burned bulb error.
Sick of this fact, I decided to give a call to my Xenon guy and asked him if he has some quality LEDs. He told me yes, 5 minutes later i was at his garage. He sold me some SMD LEDs for my position/parking lights.
Photo with flash, parking/position lights on.
 Photo without flash, parking/position lights on.
  Photo without flash, parking/position lights on.
 As you can see, they are pretty bright. And much whiter. So next day, went back and bought some other SMD LEDs. This time for:
puddle lights. photo without flash
puddle lights. photo with flash (sorry, my car really needs a bath)

 license plate. photo with flash
 ...and license plate photo without flash.

But I also wanted the same light inside so I switched the following lights to SMD LEDs

Dome light. Again photo without flash. 
 same dome lights photo with flash
and the front reader spots

ambient light passenger side (without flash)
 ambient light driver side (without flash)
 rear reading lamps (without flash)
The best thing about all the interior lights is that they still maintained the nice dimming effect after turning on the ignition.
I also had converted the light from the glove box. However that was a not so successful conversion because the bulb was a little to short and because of that, it didn't always make proper contact with the socket, resulting in the led malfunctioning. So I switched back to the original bulb. Also, I wasn't able (yet) to change the vanity mirrors lights since those require a very thin and long bulb. However, I will probably try to modify a normal SMD LED (similar to that I used in the center dome light) to fit (not a priority).
The cost this time was a lot higher, each bulb costing about 10$. But they are still going strong since 2009. And besides that I love the cool light inside and outside my car.

So, what do you think? Hope you liked this article too! I would love some feed-back from all of you, my readers.

S60 trunk lip spoiler


Well, as you imagined, after the first modifications to my S60, my courage has grown. So I decided it was time to upgrade the sexy behind of my car. My immediate thought was to put a trunk fin or spoiler. So, I started browsing the net for alternatives. All this, just one week later after the first modification episode.
In the end, I considered a more conservative, classic if you like, look is what I am after. So I went ahead an purchased a trunk lip polyurethane spoiler from an online dealer. I remember the spoiler was made in Italy. Unfortunately, I don't remember the specific site, however, nowadays, there are plenty of options for the S60. It arrived relatively quick and we went to a professional car painter. Luckily, it was primed, so after mixing the paint and painting it, it was ready to go on the car.
I also remember that in the kit we were provided with a type of special glue. We decided it was safer for the paint not to use it. Instead we used a 3M double adhesive tape, which was and still is holding the lip spoiler firmly in place. The whole set was around 30$, but the look is priceless.

before
another angle (excuse the colors, don't quite know what happened with the pic)
finished result
 and another angle

Hope you liked this article.

Wednesday, March 27, 2013

What I changed first

My very first post


It was the summer of 2009, and what a glorious summer it was. After discussing all night with some of my friends about our cars and about modifying them (like all boys do), I left home dreaming, but with an uneasy feeling about changing my sooo "perfect" Volvo. Second day, at the same bar with my friends again, one of them told me that he knows a guy who can convert my halogen lights to xenon. Without thinking, we drove there in a heartbeat. It was pretty late (about 8:00 o'clock in the evening). The guy told me to come back around 23:00. While there, I met his partner who was specialised in tinting car windows. I decided to do both the xenon lights and the window tinting. And I left my car there. Oh, the horror. Maybe I have issues but I always had a problem of leaving my car unattended somewhere. 
So, I left the car, took a cab back to the bar and waited. Three coffes and 3 sodas later, we took a cab back at the shop. 
Shocker!!! My car doors were taken appart, hood up and wires hanging out of my headlights, one of witch was now using a xenon bulb. One hour later, under my supervising eye, the conversion was complete. Car had tinted windows and xenon lights. I almost convinced myself that night to make a full conversion to xenon (high beam and foglights too), but because of budget, I gave up. 
The xenon systems were and still are not one of the top of the line, but they still do their job just fine. However, the xenons gave me from time to time a "burned light bulb" error message. After some research, I found a site and decided to do what it says, and presto, no more error message....ever.
So..., this is the story of my first mod ever. Hope you liked it. Maybe it made you remind your first mod to your beloved car. If so, write me a comment with your story.

original halogen lights
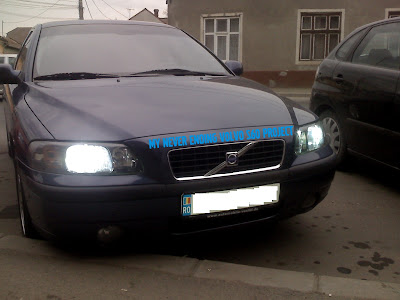
the xenons
front side view
 the windows tinted