My first step when I start a project involving the electrical equipment is always to take of the leads to my battery. However, considering that the Volvo S60 has the battery in the trunk, and under a plastic shield which is rather hard to take out without taking out the spare wheel, I disconnect the leads under the hood.
You can find them under a small plastic door attached to the fuses box. Unscrew the bolt and you are good to go.
Secondly, go in the car and place the steering column in the most outward and downward position. If you have small hands and are confident that you will not scratch your cars trim you can skip this step, but bear in mind that the work space for this project is pretty small.
Now we start taking out the outer plastic rim surrounding the DIM. You need a firm but soft hand. All you need to do is to pull outward and up the rim using both your hands witch you place on the upper side of this plastic rim.
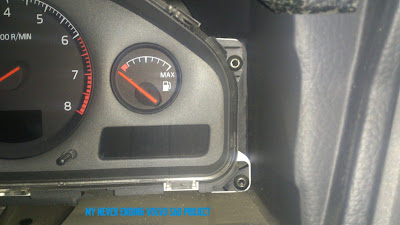
After you did this, your dashboard should look like in the picture above. Now, the bottom part of the plastic rim is taken out in a similar fashion. You place your hands right above the steering column and place your fingers in the small opening just above it. With a firm upward pull, you should have now disconnected the plastic rim.
Final note about the plastic rim. It will still be attached with 3 evenly distributed plastic clips against the small plastic cover of the steering wheel (picture below)
Pull them out gently, and your done. Now, your dashboard should look like this. The DIM is fixated with 4 torx T25 screws. Yes, there is a lot of dust in there too, mainly because, I never taken the DIM out before and the car is 10 years old, and secondly, I'm sorry to say there is a lot of dust in Romania.
2 T25 screws on the right.and another 2 T25 screws on the left.
All you need to do is to unscrew them. Careful not to drop the screws. You're almost done. Next, pull gently the DIM out and place it face down against the steering wheel like in the picture below.
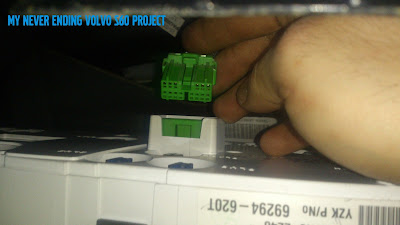
Find the green DIM connector located approximately in the middle of the clusters back panel. You can already see it in the picture above, and the next pictures below.
Now disconnect it by pressing the small protuberance on it and pulling it out.
You have now successfully disconnected your DIM.
Part 2 of the project is how to take apart the DIM.
The DIM is composed of 3 parts that are attached together by plastic clips. There is the electronics part which is located in the white plastic casing, the black plastic casing which is the part where all the kph and revs, etc are painted upon and the final part is the lens. Using a Flathead screwdriver you can gently separate them. As you can see in the picture below, there are 3 black clips and 4 transparent clips on the bottom which have to be undone.
On the upper side of the DIM there are another 3 clips that hold the white electronics part. Undo them gently. Now you have access to the electronics module.lifting the lens and black trim of the instrument cluster.
The lens is attached to the black plastic part by 5 transparent clips. Undo them gently, and be careful about the center one, I broke a sweat trying to remove it
Well, that's about it. Now your DIM is disassembled. To reassemble it, press all the parts carefully back, and follow all the steps back. Don't forget to reattach the green connector and the leads to the battery and your all done.
I wish to thank my brother-in-law for helping me (you can check his games site if you like) and, of course my fiancee for cleaning up inside the car where all the dust was (check her cosmetics website or her blog)
Well, I hope everything was clear and helpful. If you encounter problems, contact me or write me a comment. Also if you like my work, keep reading and let me in your ideas by writing a comment below.
Till next time, safe journeys!


good work last night:))
ReplyDeleteyeah, it was fun. thanx again!
ReplyDeleteHarnicutul meu:x
ReplyDeleteWhy did you do this? Were you replacing the voltage regulator and/or heat sink? I'm trying to find someone with information on this.
ReplyDeleteWell, since I am always afraid of screwing my car and because I heard that sometimes you can get a srs failure message I always disconnect the battery leads. Again, I recommend this because I don't want any messages. It doesn't mean you have to disconnect the battery. Better safe than sorry
Delete