
Hello to all!
This time I'll write a step by step instruction regarding on how to upgrade your side mirrors to the 2007+ model, the ones with integrated side markers, or blinkers.
If you have read the previous post, you know I have bought a pair of rear "jewel" taillights. I told you that I have also bought a pair of 2007+ side mirrors with integrated blinkers and courtesy lights.

I was really happy to have found them especially because they were already in the same color as my current mirrors.

So, first things first. Disassemble my mirrors and put the new ones in place. The procedure is very easy and straightforward. You start by opening the door and removing 2 plastic trims using a bone tool, or as I do it, with a credit card :) since I don't have a bone tool. For this first piece I always start from the bottom and go up.

Behind it you will find 2 Torx 25 mm screws. One is at the bottom.

And the other is on the upper part of this assembly.

The second plastic trim is the one that is above the door cover in the corner.

Behind it you will find a 13mm bolt that holds the mirror attached to the door.

Do not unscrew this bolt just now, first you have to continue to disassemble the door cover. It is still held in place by 8 plastic retainers like the ones in the picture below:

The way I remove them (although it's not the only way) is press the center piece with the tip of the same Torx screwdriver I used on the screws before. This way, I prevent breaking them and assure their reusability. After the retainers are off, all you have to do is lift gently the door cover and then pull it gently towards you. Now disconnect the door handle release wire pictured below;

and the 3 connectors you see in the picture.

Now you can put the cover (panel) aside and proceed to unscrew the aforementioned 13mm screw that holds the mirror in place. And this is how it looks after I have removed the mirror.

For the reassembly I followed the same steps only backwards. And below is the new mirror in it's place.

And another shot from the front.


The final shot with both mirrors installed:

But this was not the end of this project. The mirrors worked fine, the courtesy light, electric heating and adjusting were working as they should have. This is because the new mirror had an exact connector as the old one.

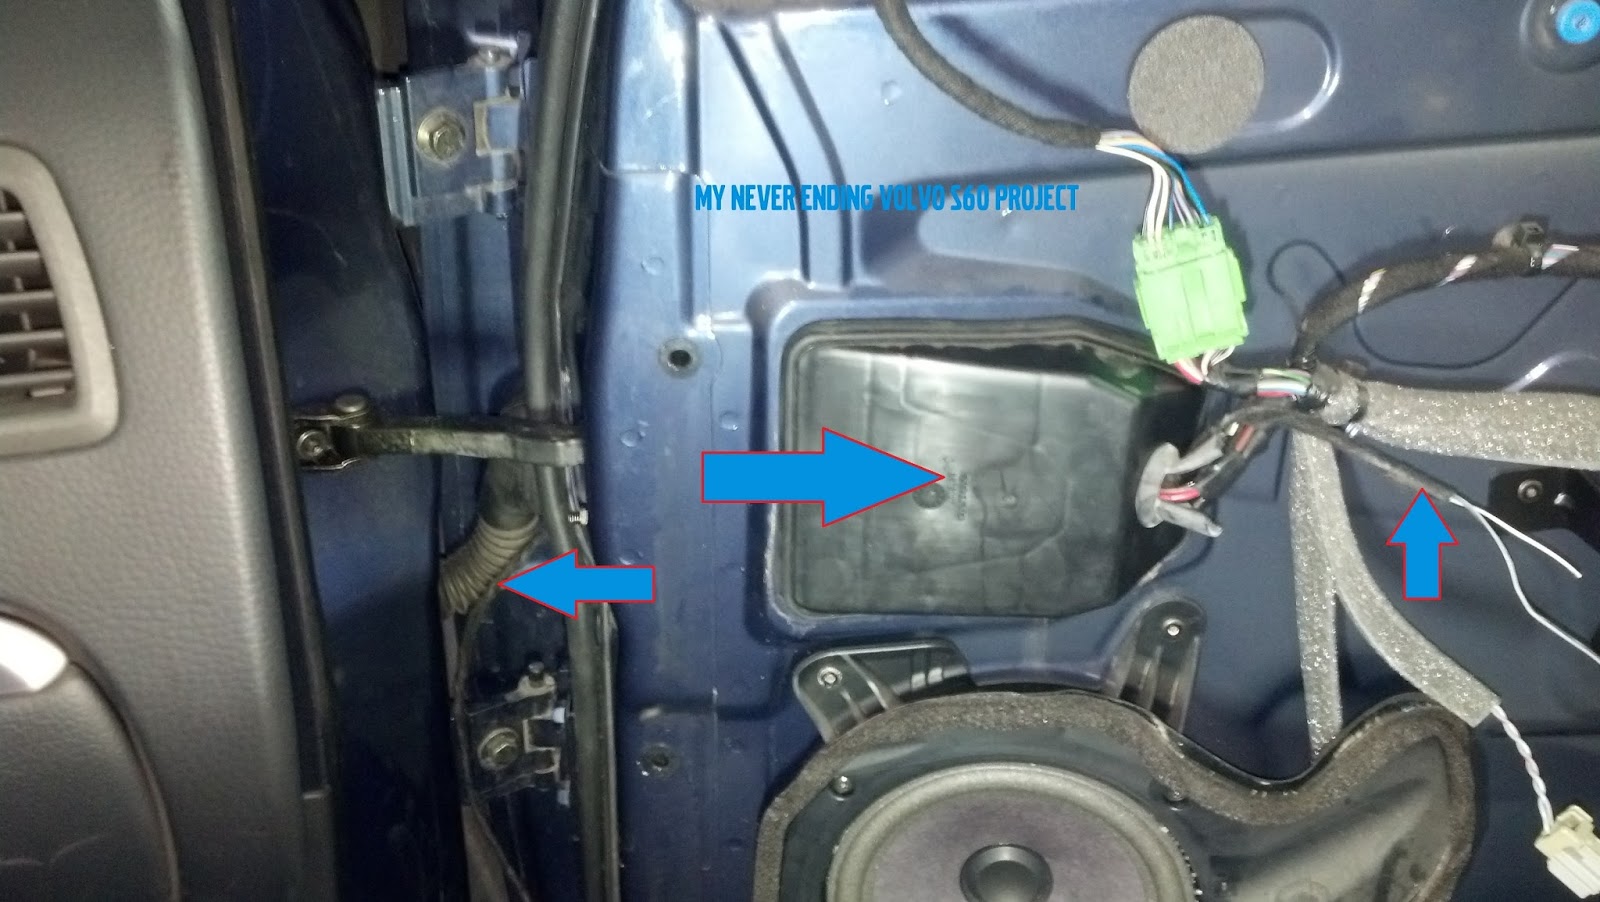
However, the incorporated turn signals did not work, because, there was no wire connecting the new mirror to the turn signal relay. So the next step was to connect them. So I had a look on how to pass the wire from the mirror, through the door and pull it all the way in the front next to the original side marker. At first I didn't find a way, but after a few minutes I found a way so I wouldn't have to drill a hole through the door. This is what I did: You can see in the picture below there is an arrow pointing to a large plastic cover and anoter arrow pointing to my new wires.

First, I took out that cover. It is held by to inner clips, you just have to pull it gently and it will come off easily. So I passed my cable through the seal that is depicted in the picture below. That rubber hose that you see in the picture is filled with other cables. There is no point in passing your cable through it because, at the other end (near the door inner edge) it has a white connector that has two 10mm screws that hold the connector and hose to the chassis. So I unscrewed the screws and pulled the connector....

so that I would pass my wire under the rubber hose

Now, I decided I will discard one of the bolts from this connector and pass my wire through the new hole that I created. The screw is not molded into the plastic of the connector. Using a 6mm star bit I managed to unscrew it from the connector.

Next, I passed the cable through the hole in the door that I obtained by removing the connector's screw.

Now, I placed the connector back in it's place, and you can see my wires passing through the door in the new hole.

And the bolt is back on the screw and the connector is back in it's place safe and sound.

This stage, the wire is safely placed in the door, and passing through it freely under the plastic hose that you can see between the door and the fender.

The last step of the wiring was to "fish" the wire through the hole in the fender where the side marker is located.

Now, I connected the white-black wire to the brown wire and the gray-black wire to the green wire.

And completed the circuit on the mirror's end connecting the white-black wire to the black wire and the gray-black wire to the mirror's blue-black wire.

Of course, there are other ways to make all this work. This was the method I chose, basically because I did not have suitable metal pins for the mirror's green connector. So this is a temporary solution until I find this type of pins. The important thing is that both mirrors work and the blinkers work.


Well, that's it. Hope you like the result and hope you found this useful. If you decide to do this project, and you need help, use the comment section below, or use my Facebook page and I will try to help you.
Safe journeys everyone!


