Showing posts with label post. Show all posts

Saturday, March 30, 2013

Painting the exterior mouldings

Hello, my friends!
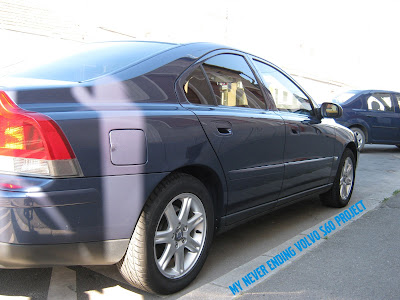
Today I will share the experience I had during the hot summer of 2010, when I decided I wanted to paint my Volvo S60s exterior plastic mouldings. I decided to go that way, because I wanted, as I said in earlier posts, an exterior look closer to the newer S60 models. Here's my car before the paint-job:
You probably wonder, how did I got the obsession about the MY2005 and up look? Well, funny thing, I parked once near an almost exact Volvo S60. Why is funny? Because here in Romania, it's more likely that 2 identical German cars (SUV) will meet in a random intersection (seen it quite often) than having 2 Volvo S60s parked next to each other. So the pictures below are quite rare (impossible even, in Romania). The only noticeable difference was the exterior look. Of course the car color was also a bit different, mine is Volvo Cosmos blue metallic 450, the other is a newer shade - Volvo Barents blue metallic 466, but, I prefer my shade of blue. Here, what do you think?
twins with a different birth date
 and another shot.
So, I went to the guy who painted my trunk fin and asked him to paint the mouldings. Also, must note that I didn't paint the side skirts, because I didn't quite made my mind as to how they will  look in the end, will I buy some sport kit side skirts or not, etc. 
Another note, the plastic mouldings had a discrete course look and feel to them, witch had to be sanded down for perfect paint adhesion. And a funny note, I already confessed my fear of damaging the car in the process of updating, so I also bought a used set of exterior mouldings. Now they lay around in my back yard. The mouldings came off quite easily, being hold in place with nothing but a few clips and double sided tape. Next day they were finished and installed. Here's the finished look:
front
 back
 side
 front, drivers side
Improvement or not? Tell me what you think. Write me a comment in the section below.


Thursday, March 28, 2013

S60 trunk lip spoiler


Well, as you imagined, after the first modifications to my S60, my courage has grown. So I decided it was time to upgrade the sexy behind of my car. My immediate thought was to put a trunk fin or spoiler. So, I started browsing the net for alternatives. All this, just one week later after the first modification episode.
In the end, I considered a more conservative, classic if you like, look is what I am after. So I went ahead an purchased a trunk lip polyurethane spoiler from an online dealer. I remember the spoiler was made in Italy. Unfortunately, I don't remember the specific site, however, nowadays, there are plenty of options for the S60. It arrived relatively quick and we went to a professional car painter. Luckily, it was primed, so after mixing the paint and painting it, it was ready to go on the car.
I also remember that in the kit we were provided with a type of special glue. We decided it was safer for the paint not to use it. Instead we used a 3M double adhesive tape, which was and still is holding the lip spoiler firmly in place. The whole set was around 30$, but the look is priceless.

before
another angle (excuse the colors, don't quite know what happened with the pic)
finished result
 and another angle

Hope you liked this article.

Wednesday, March 27, 2013

What I changed first

My very first post


It was the summer of 2009, and what a glorious summer it was. After discussing all night with some of my friends about our cars and about modifying them (like all boys do), I left home dreaming, but with an uneasy feeling about changing my sooo "perfect" Volvo. Second day, at the same bar with my friends again, one of them told me that he knows a guy who can convert my halogen lights to xenon. Without thinking, we drove there in a heartbeat. It was pretty late (about 8:00 o'clock in the evening). The guy told me to come back around 23:00. While there, I met his partner who was specialised in tinting car windows. I decided to do both the xenon lights and the window tinting. And I left my car there. Oh, the horror. Maybe I have issues but I always had a problem of leaving my car unattended somewhere. 
So, I left the car, took a cab back to the bar and waited. Three coffes and 3 sodas later, we took a cab back at the shop. 
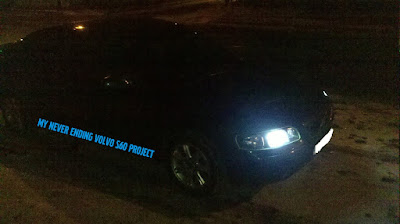
Shocker!!! My car doors were taken appart, hood up and wires hanging out of my headlights, one of witch was now using a xenon bulb. One hour later, under my supervising eye, the conversion was complete. Car had tinted windows and xenon lights. I almost convinced myself that night to make a full conversion to xenon (high beam and foglights too), but because of budget, I gave up. 
The xenon systems were and still are not one of the top of the line, but they still do their job just fine. However, the xenons gave me from time to time a "burned light bulb" error message. After some research, I found a site and decided to do what it says, and presto, no more error message....ever.
So..., this is the story of my first mod ever. Hope you liked it. Maybe it made you remind your first mod to your beloved car. If so, write me a comment with your story.

original halogen lights
the xenons
front side view
 the windows tinted