Pages

Sunday, April 14, 2013

Let's spin those wheels and clean that 'shield

Hello there! What a beautiful Sunday it is. We can already smell the summer aromas and feel the wonderful touch of the sun. About a year ago, I felt the urge to buy some 17" wheels. Of course I didn't had the budget to buy new ones (with prices in the range of 1000 euro per piece) so I started browsing the net for used ones in good condition. In fact, the search started around Christmas last year, but unfortunately, I didn't manage to find anything to my liking.
First I found a set of 4 THOR wheels. They were ok in the pictures, but they were very nasty looking, when under a closer inspection.
After I found a set of TALOS wheels. Ahh, the TALOS... Some of my favourite ones out there. Unfortunately the price was close to a new set so, with a broken heart, I forgot about them.
This is when I dropped the search until May last year, when I found a pair of ZAURAK. They where diamond cut/dark gray in color and curiously enough were originally mounted on a Volvo V70 MY 2005. Well, I know, Volvo offers the ZAURAK on the C30, S40 and V50, and they have slightly other dimensions as the S60 17" wheels. But, considering they were mounted successfully on the V70 mentioned above, I decided to go ahead. I found them at a car recycle yard (yes, the V70 had an accident) and I was really afraid they were damaged in a way not visible in the pictures I received.
Luckily, they arrived the next day and I was very happy with my purchase since they were almost new. Only one of them had a damaged spoke (very deep scratch) but I will repair that eventually. Here are some pics:

sexy close-up
 and another picture (here you can see some marks on my left fender, a guy decided to overtake me when I was parking, will be fixed sometime in the future)
and a picture of my old MIMAS 16" wheels that are now used as winter tyres

All went well, just plug and play... with a sole exception... the new wheels started to rub against the plastic mud cover which is situated under the fender. What a stroke of luck that I thought of that before and bought the black steering stop limiter (OEM code 31212191) (normally they are for the 18" tyres). There are also some white steering stop limiters made for 17" wheels (OEM code 31212190).
Here are some pics of the steering stop limiters both the blue one (really used) which was factory installed on the car and the new black ones:
the blue one (OEM code 31212189) (only for 16" wheels).
 black and blue
 and again from the side. (notice how much bigger the black one is)
That fixed the wheel rubbing.

The last mod I did last summer was to switch my wiper blades to the new flat design which is standard on the +2005 Volvo S60s. They are BOSCH and were a gift from my beloved girlfriend, now fiancee, future wife ;)...
 ... don't forget to check her blog
Safe journeys everyone! Don't forget the comment section bellow, if you have any questions or other ideas. I would love to read them!

Thursday, April 11, 2013

Upgrading to MP3

A big Hi to all my readers! I've been really busy the last few days,unfortunately it was work related not passion related, so I was unable to post anything new. But now, I will love to tell you about the something I did to my car last summer.
Basically, I got tired of burning CD so that I have some sort of music compilation to my liking, and also, I am one of those persons who get tired of a song pretty fast. So I decided it was time to upgrade my trusty old HU 603 to be MP3 capable.
So I started scouring the net for alternatives, till I found this: 

I know, I know, it's made in China. But I decided to go ahead and purchase it nevertheless against my better judgement maybe because it was readily available in Romania at a relatively low cost and fast shipping.
The installation was pretty easy, requiring only to remove the HU unit (naturally), AC and some other trims. Of course I removed the battery connectors first. As far as cable modifications go, I only had to connect the power cable of this unit to the power cable of the car and isolate the wires (easy job even for an electronics noob like myself). The kit came with a pretty useful manual explaining which wire is the power in my car. This particular model uses a connector cable that fits with the CD changer input jack and requires disconnecting the CD changer (if available) and loosing it's functionality. Trust me, you don't need it anymore after this upgrade.
Unfortunately I don't have any pictures about how to remove the AC, HU and other trims, but I'm sure with future projects I will make some.
I decided to place the main unit in the center console, so I had to remove the trims all the way to that place. The plastic trim snapped off easily. The connector which connects the HU to the main MP3 unit was luckily long enough, although maybe it could have been another 10 cm longer. 
Here's the end result:
The MP3 unit can use a USB Stick, a MMC card or it can connect to your mobile phone using a standard 3,5mm jack.
 here is where the connector comes out from beneath the plastic trims. As you can see, no cutting of the trim was necessary 
 another angle
Here is a picture of the cable going under the plastic trim of my gearshift lever
 I draw with a red line the path of the connector under the plastic trim. The most tricky part was to be sure it doesn't impair the gear shift (especially when in reverse).
Now we have almost limitless music in our car. Definitely worth the investment. One last note, it appares that this device in particular can not read very long MP3 (like a MP3 file of a full concert or something similar).
So, what do you think? Tell me if you consider a project like this and, if your answer is yes, tell me how can I help you!
Till next time, safe journeys!

Tuesday, April 2, 2013

Let's talk about rings, baby

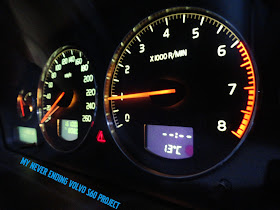
As you may have already read my first unboxing post, you know already that I purchased a set of chrome dial rings. Well, i installed them (you can follow all the steps of the installation here and all the steps about how to disassemble the instrument cluster here). The look is amazing. I can not state enough how much an improvement. Watch for yourselves:
 picture with flash, 
 picture without flash
 contact. WOW factor
 artistic closeups
 another
My ending thoughts: definitely worth the price of the rings, and the labor. Love it.
Hope you like the final result. Tell me what you think.
Safe journeys everyone

Monday, April 1, 2013

Volvo S60 chrome dial rings assembly

A few days ago I wrote a post about a recent purchase of mine namely some chrome dial rings (here's the link). Now it's time to tell you about the installation process.
It all started with disassembling the instrument panel. You can go to the entire process by following this link. Afterwards I placed one ring at a time to the desired place, and using a pencil, I bended the protruding edge.

 pressing down on the protruding edge using a pen (it's a pretty hard work I might add, the metal is quite hard)
That was the first ring. I started with the smaller ones because I find smaller things to be the most difficult. After that, I started work on the other small ring. And at the end I finished with the 2 large ones, the ones that surround the odometer and the rpm meter. Here's the finished process. All 4 rings locked in place.
and the final look.
All in all, it's a simple job that requires but some strong and steady hands. After that, it was a simple job of putting all back together. You can already see the aesthetic improvement.
first I connected the electronics part to the front fascia part 
 and a close-up
 another close-up
 and finally, the lens was placed back where it belongs.
I'm sorry to confess that the pen didn't make it. It's tip was obliterated by the chrome rings. However, his sacrifice will never be forgotten.

That's it! Stay safe all! Don't forget to comment my work or write any other idea that you may have in the comment section below. Also, if you find my post useful, please share.